Doing your own vinyl siding installation can save you quite a bit of money and drastically improve the look of your home. But many do-it-yourself installers make common mistakes that cause siding to buckle or appear warped.
Vinyl siding provides a great, low-maintenance option that can add rich color and style to your home. It is generally pretty easy to keep clean and doesn’t require any painting or sanding, as the color typically doesn’t fade after years in the sun.
Although there are lots of vinyl siding styles out there, the most common type of style is horizontal slats. We’ll share a few installation tips from the pros for a successful installation:
Leaving Room to Move is Key to Successful Vinyl Siding Installation
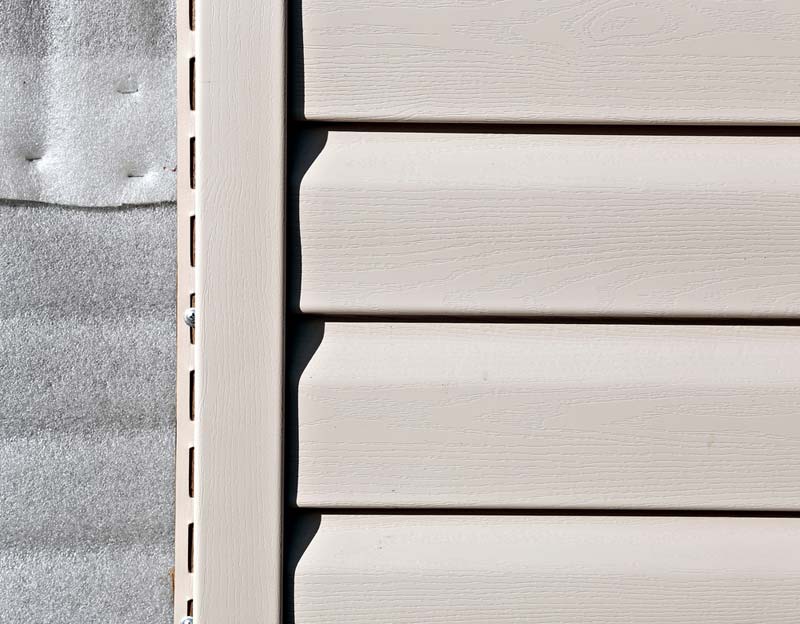
Vinyl siding expands and contracts in warm and cold weather. It is important that the siding have enough flexibility to move as needed to prevent it from buckling. Siding has fairly wide pre-drilled holes for nailing. Use only these holes for nailing and never drive nails through the face of the siding. It is recommended that the nail be placed directly in the middle of the nail hole to give it space to move from side to side.
When attaching your siding, it’s very important that the nail not be pounded in completely tight. Doing so prevents the vinyl siding from being able to slide left and right as intended. Use only galvanized or roofing nails that won’t rust. You can also choose to use screws, as long as they also aren’t installed too tight.
As you work your way up the wall, make sure the lip of each siding panel gently locks in to the one below it.
Find more information and installation resources at the Vinyl Siding Institute.